Are your lashes not so fab! Well thy can be fab every day,it only takes one minute! Get a lash curler and every day do each lash for 30 seconds! Then add some eye shadow,eye liner,or some mascara! And you
to can have fab lashes!
Sunday, August 21, 2011
3 Cutie Campass looks!
The Classic Messy BunTossing it up into a high messy bun after jumping out of the water can be a cute and simple solution for any type of hair; especially when you want to avoid getting it full of sand! After getting out of the water, simply use your towel to shake out excess water from your hair. Then pull your hair either up high or down low and fasten it with a hair tie, letting pieces fall out all around. This style looks cute and messy in all the right ways!

The Low Side Braid
A simple loose side braid is definitely one of my all time favorite styles for when my hair looks a mess. It’s especially awesome in the summer for when you get out of the water and your hair looks terrible but you want it to look cute later! Simply pull your hair to favor one side and braid loosely. Later on when you take out the braid, you’ll have loose waves for a hot beachy look.

The Bun With a HeadbandMessy buns are great, but I know my biggest problem is that my bangs sometimes make it difficult for that style alone to be effective in taming my hair. They always end up falling out into my face! A simple and cute solution to this is to use skinny colored headbands with your bun. First, put your hair into a messy bun, leaving it poofed a little at the top. Then add one or two headbands for a great look that will keep those annoying fly-aways out of your face!

The Low Side Braid
A simple loose side braid is definitely one of my all time favorite styles for when my hair looks a mess. It’s especially awesome in the summer for when you get out of the water and your hair looks terrible but you want it to look cute later! Simply pull your hair to favor one side and braid loosely. Later on when you take out the braid, you’ll have loose waves for a hot beachy look.
The Bun With a HeadbandMessy buns are great, but I know my biggest problem is that my bangs sometimes make it difficult for that style alone to be effective in taming my hair. They always end up falling out into my face! A simple and cute solution to this is to use skinny colored headbands with your bun. First, put your hair into a messy bun, leaving it poofed a little at the top. Then add one or two headbands for a great look that will keep those annoying fly-aways out of your face!
Saturday, August 20, 2011
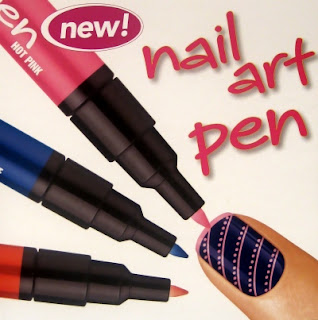
Cool Nail Art Pens, & How To Use Them! This Will Teach You Step By Step How To Do This.
If you enjoy reading then you will LOVE this post!
Looking for a beautiful way to spice up your look? Nail art can complement your outfit for a special event or add a unique flair to your appearance every day. While very detailed nail art is best left to professionals, there are a number of techniques that you can do in your own home. With a little practice and a lot of patience, you, too, can create beautiful, unique designs to brighten up your nails.
Looking for a beautiful way to spice up your look? Nail art can complement your outfit for a special event or add a unique flair to your appearance every day. While very detailed nail art is best left to professionals, there are a number of techniques that you can do in your own home. With a little practice and a lot of patience, you, too, can create beautiful, unique designs to brighten up your nails.

Make sure your nails are in good shape. Learn how to keep your nails healthy and beautiful. Your nails should not be bitten. You don't need a manicure to start creating nail art, but you do need to make sure that your nails are clean and shaped well enough that they look even. Also make sure that your cuticles are nice and healthy.To make them soft you can use petroleum jelly
Step 2.
Choose the right products. There are a multitude of different paints and polishes available for nail art, and your choice of products is completely up to you. Experiment with a few different brands and types of polish or paint to see which you like best, and don’t forget to give acrylic craft paints a try — these work great and are a whole lot cheaper than nail paints or polish. You’ll also be able to choose from a variety of implements to help you apply your paint. You can buy professional-grade nail art kits that include all the brushes, stripers, and marbling tools you’ll need, or you can improvise. A toothpick or bobby pin, for example, can help you apply dots and swirl colors with precision, and thin-tipped detail brushes available at your local arts or hobby store can work just as well as special nail art brushes. In addition, remember that you can create art on your natural nails or on artificial tips, and the variety of artificial nails is truly dizzying. Perhaps most importantly, though, make sure you have pure acetone for quickly removing mistakes, and have a small brush and/or Q-Tips, makeup pads, or cotton balls available solely for applying the acetone.
Step 3.
Look for ideas and techniques. This article is a good primer, but if you have trouble coming up with ideas after a while, or if you want to get more in-depth information about techniques, consider taking a class at your local nail salon. Just a few hours with a professional teacher can advance your skills like years of practice. There are also a number of books on nail art. You may be able to find one in your local library or bookstore, but if not, buy them online. Finally, the web is a great resource, especially if you’re just looking for new ideas. There are several sites on which people post their latest creations, and you can also find a few forums frequented by beginners and pros alike. Also, watch videos on sites such as YouTube that show you step-by-step how to do certain designs.
Step 4.
Get your materials ready. While nail art requires a lot of patience, you’re also constantly working against the clock when you’re creating it, since the paints and polishes dry fairly quickly. Before you begin, make sure you have everything you need ready and accessible, especially acetone for quickly removing mistakes.
Step 5.
Give your nails a base coat. Before you begin your nail art you need to create your canvas. Depending on the look you’re going for, you can paint your nails a neutral color, such as clear, white, pale beige or pale pink, or you can paint them any other color you desire. You may also wish to divide the nail into two or three different colors. Do two coats, as it strengthens the nail and gives a better finish. Make sure your “canvas” is neat and even, and allow it to dry thoroughly before proceeding.
Step 6.
Create your nail art on top of the base coat. Dip your brush or other tool in one color of paint to make sure the paint adequately and evenly covers it. If your brush has globs, excess paint, or not enough paint, you’re going to have trouble painting. Keep your art simple. There’s plenty of room for creativity — you can create pictures, abstract designs, etc. to your heart’s content. However, don’t make your nails look too “busy.” Simple designs are often the most beautiful, and if you’re a beginner your chances of success are far greater the simpler your art is.
Step 7.
Apply a top coat. Once all your nail art is dry, paint over it with a clear protective acrylic top coat to seal and protect your nail and your hard work.
Step 8.
Care for your art. Reapply a clear top coat every two or three days to protect your art and keep your nails looking shiny. Apply cuticle oil daily. Treat your nails with care — wear gloves when gardening or doing other work, and exercise caution when performing tasks such as opening soda cans, as they may damage your nails.
You Can Get These Nail Art Pens Anywhere Like Walmart, Target, etc.

.
Thursday, August 18, 2011
BTSO-Back To School Outfit! #1
A Cute back To school outfit is to wear a Cute pair of flare,jeggings,boot cut,and skinny jeans with either a cute Graphic-tee or a cute lace top with a tank top! And either some cute flats or sneakers! With a cute updo! If you have wavy or curly hair leave it down and had a head band or hair piece! For More back to school outfits come to our blog every week for a new outfit!
Monday, August 1, 2011
How To Properly Comb Your Hair Out!
Have you ever got in the pool and your hair be all knotty! Get in the shower after and wash the chemicals that come from the pool out and goes in your hair! Then Comb out till your hair is perfect no knotts at ALL~next dry your hair with a hair dryer,and put ur hair up in a pony tail or a bunn! So that way your hair will stay PERFECT and KNOTT FREE! and won't hurt!
Subscribe to:
Posts (Atom)

